
How to Clean a Sprinkler Filter in West University
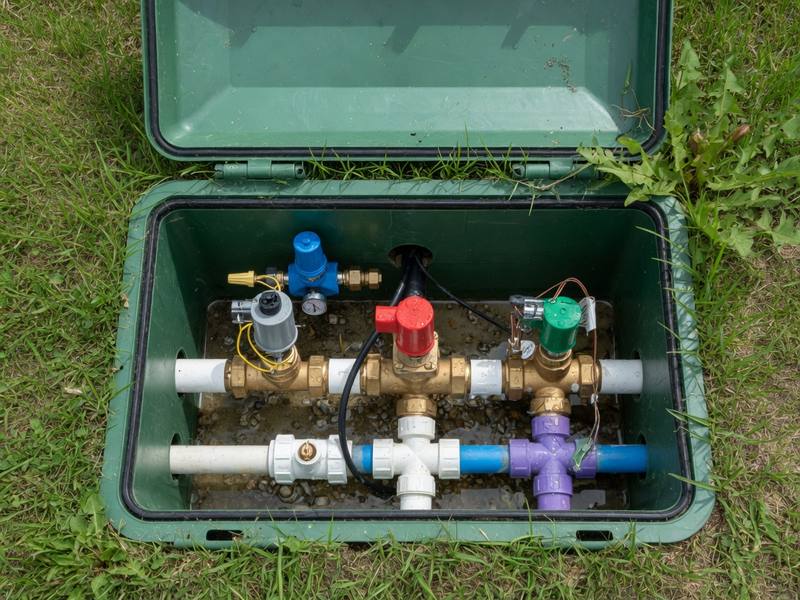
A clogged filter is one of the most common reasons a sprinkler system starts underperforming. If your spray heads sputter, your coverage looks patchy, or your water pressure drops for no obvious reason, dirt trapped in the filter is often the culprit. The good news? Cleaning a sprinkler system filter is a simple task most homeowners can handle in about 20 minutes — and when it’s not, West University Sprinkler Repair is always here to help.
In this guide, you’ll learn why filter cleaning matters, how to clean your filter step by step, and when it makes sense to call in a professional for a replacement. We’ll also cover a few related maintenance tasks that keep your whole system running smoothly. Let’s dig in.
Why Cleaning Your Sprinkler System Filter Matters
Your filter has one job: to catch sand, grit, and debris before they reach your valves and sprinkler heads. Over time, all that trapped material builds up and restricts water flow.
When you skip filter cleaning, a few things start to go wrong:
- Weak or uneven watering. Clogged filters lower pressure, so some zones get plenty of water while others stay dry.
- Clogged sprinkler heads. Debris that slips past a damaged filter can jam individual heads, leading to costly repairs.
- Higher water bills. A struggling system often runs longer to compensate, wasting water and money.
- Premature wear. Valves and pumps work harder when flow is blocked, shortening their lifespan.
A clean filter protects the rest of your system. Think of it as cheap insurance against bigger problems down the road.
How Often Should You Clean the Filter?
For most homes, cleaning the filter two to three times per season keeps things in good shape. If you have well water, hard water, or a lot of sediment in your supply, you may need to clean it monthly.
A good rule of thumb: check the filter during your spring startup, again mid-summer, and once more before winterization. If you notice a sudden drop in pressure, inspect it right away.
What You’ll Need
Gather these items before you start:
- A bucket or towel to catch water
- An adjustable wrench or channel-lock pliers
- A soft brush (an old toothbrush works well)
- A garden hose with a spray nozzle
- Replacement filter screen (optional, in case yours is damaged)
Having everything on hand makes the job faster and keeps you from tracking mud back and forth to the garage.
How to Clean a Sprinkler System Filter Step by Step
Follow these steps in order for the best results. Take your time with each one.
Step 1: Shut Off the Water Supply
Turn off the main water supply to your sprinkler system before you touch anything. This prevents a mess and keeps you from working under pressure. If your system has a dedicated shutoff valve, use it.
Step 2: Relieve the Pressure
Run a zone for a few seconds using your controller, or open a manual drain valve. This releases any leftover pressure in the lines so the filter housing comes off cleanly.
Step 3: Locate and Open the Filter Housing
Most filters sit near the backflow preventer or at the start of the main line. Unscrew the filter housing by hand or with your wrench. Keep your bucket underneath to catch trapped water.
Step 4: Remove and Inspect the Screen
Slide out the filter screen and take a close look. Light dirt and grit are normal. But if you see cracks, torn mesh, or corrosion, the screen needs replacing rather than cleaning.
Step 5: Rinse and Scrub the Screen
Hold the screen under running water from your hose. Use the soft brush to gently work debris out of the mesh. Brush in the same direction as the water flow to avoid pushing dirt deeper. Keep rinsing until the water runs clear.
Step 6: Clean the Housing
Wipe out the inside of the filter housing with a damp cloth. Remove any sediment that settled at the bottom. Check the rubber O-ring or gasket for wear, and replace it if it looks flattened or cracked.
Step 7: Reassemble and Test
Place the clean screen back into the housing and screw everything together snugly. Don’t overtighten, since that can crack the housing. Turn the water back on slowly, then run each zone to confirm strong, even flow and check for leaks.
That’s it. A clean filter should restore your pressure and give you consistent coverage across every zone.
Common Mistakes to Avoid
Even a simple task has a few pitfalls. Watch out for these:
- Skipping the pressure release. Opening the housing under pressure sprays water everywhere and can damage parts.
- Scrubbing too hard. Aggressive brushing tears the mesh and defeats the purpose.
- Overtightening the housing. Plastic threads crack easily. Snug is enough.
- Ignoring a damaged screen. A torn filter lets debris through, which causes clogs elsewhere.
When to Replace the Filter Instead of Cleaning It
Sometimes cleaning isn’t enough. Plan on a replacement when you notice:
- Cracks, holes, or fraying in the mesh
- Rust or corrosion on metal screens
- Warping in the housing or a gasket that won’t seal
- Pressure problems that persist even after a thorough cleaning
Filters are inexpensive, and swapping a worn one is far cheaper than repairing the valves and heads it’s meant to protect. If you’re unsure whether yours needs cleaning or replacing, a professional can tell you in minutes.
Related Maintenance That Keeps Your System Healthy
Filter cleaning works best as part of a bigger maintenance routine. A few related tasks pay off in the long run:
- Pressure checks. Testing water pressure across all zones confirms your filter fix worked and flags hidden leaks or blockages.
- System tune-ups. A full inspection and adjustment catches small problems early, from misaligned heads to failing valves.
- Backwash services. Flushing built-up sediment out of the lines prevents debris from clogging your filter again so quickly.
- Seasonal service. Spring startups and winterization protect your system from freeze damage and get it ready for peak watering months.
Handled together, these steps keep your system efficient and extend its life for years.
Quick Recap
Cleaning your sprinkler filter is one of the easiest ways to protect your entire irrigation system. Shut off the water, relieve the pressure, remove and rinse the screen, then reassemble and test. Do it a few times each season, replace a worn screen when needed, and pair it with pressure checks and tune-ups for the best results.
Ready for Professional Filter Service?
If you’d rather leave it to the experts, or you’ve cleaned your filter and still notice weak pressure, the team at West University Sprinkler Repair is here to help. We handle filter cleaning, filter replacement, and full system maintenance so your lawn gets the even, reliable watering it deserves. Book online today or call us at (555) 010-8303 to schedule professional filter cleaning and replacement. Let’s get your system running like new.
Call 346-294-8444 Services FAQ